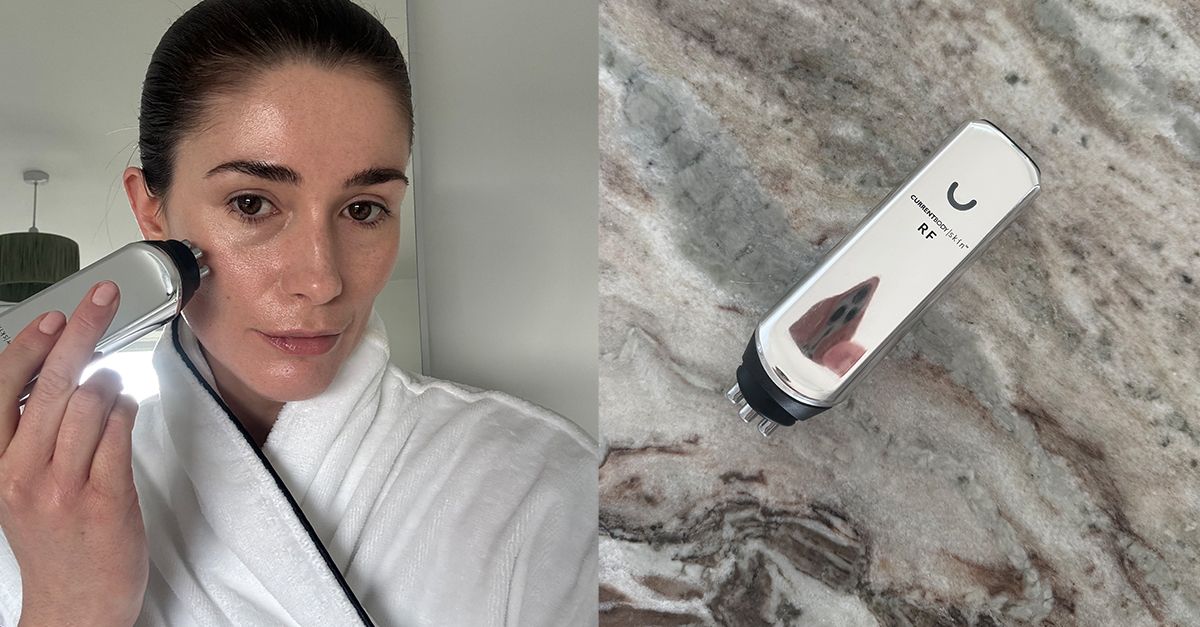
If there’s one thing you need to know about me, it’s that I love reviewing skincare tools and devices. From LED masks to microcurrent devices, I’m up for testing anything and everything—I’ve tried them all. So, when Currentbody launched its new Skin RF Microneedling Treatment (£349), I knew I had to give it a try for myself.
As someone who has had a course of radio frequency microneedling treatments in-clinic, I was curious to see how this inspired at-home version would fair in comparison to the real deal. Currently, I’ve paused on having Botox (I love the results, but I just can’t justify the upkeep and cost right now), but I’m still wanting to address the lines around my eyes and forehead without visiting a clinic.
I’ve been road-testing this new skin tool over the past month, and I have a lot of thoughts about it…
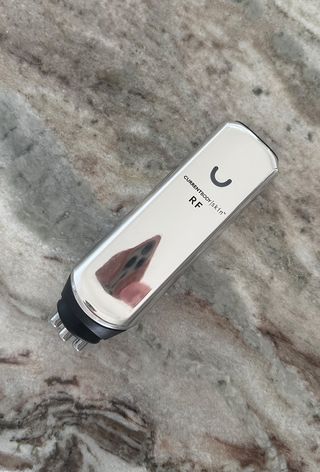
Currentbody Skin RF Microneedling Treatment Review
(Image credit: @eleanorvousden)
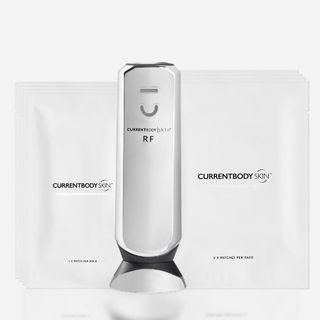
CurrentBody Skin
Skin RF Microneedling Treatment
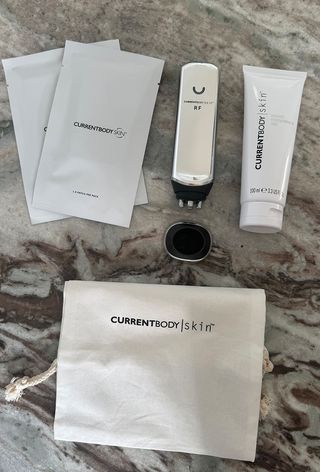
Inside the Starter kit:
CurrentBody Skin RF Radio Frequency Skin Tightening Device
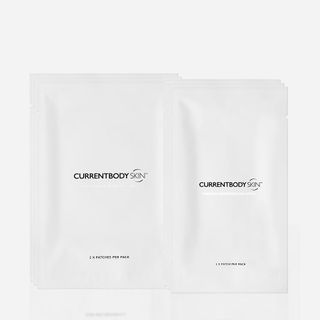
x8 eye microneedling patches
x8 forehead microneedling patches
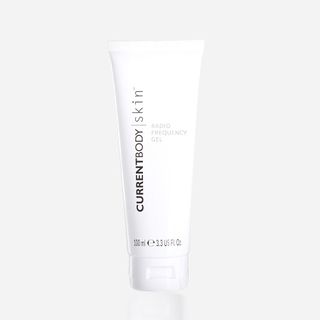
Radiofrequency gel
Travel bag
Adapter plug
Power cable
Specifications:
3 radiofrequency strengths
Microneedling patches with dissolvable needles, infused with hyaluronic acid and peptides
Treatment is required weekly for 8 weeks, then top-ups are required every 4 weeks
For
- Firms
- Improves skin texture
- Encourages collagen production
- Combines radio frequency with microneedling technology
- Only one treatment is required each week
- Easy to use
- No downtime
- Three radio frequency modes
- More affordable than in-clinic radio frequency treatments
Against
- Expensive
- A full facial treatment can take a long time
- Won’t deliver the same technology as traditional in-clinic microneedling treatments
- The gel and microneedling patches require purchasing once you run out
- Lots of excess packaging comes with the microneedling patches
- Not cordless, so needs to be plugged into mains
The Microneedling Treatment
(Image credit: @eleanorvousden)
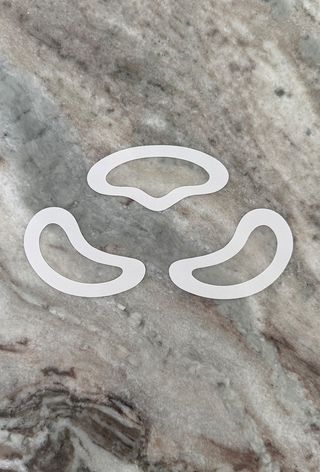
I want to clear one thing up first: this device isn’t like a microneedling treatment that you would have in the clinic—or even an at-home dermaroller (not recommended) for that matter. This at-home version doesn’t use needles that will leave you bright red like clinical appointment. Instead, this is an inspired treatment that uses “microneedling” patches.
Each patch has teeny tiny micro “needles” that are made up of hyaluronic acid and peptides. When you apply them, the needles gradually dissolve into the skin as a targeted treatment to plump, reduce fine lines and improve skin texture around the forehead, under eyes and crow’s feet. In the kit you get eight forehead patches and eight eye patches. However, you can use them wherever you like, such as on laughter lines or anywhere else you want to treat.
Currentbody advises using wearing these for about two hours, or overnight prior to your radiofrequency treatment (more on that below). I was expecting the forehead patches to be a little larger than they are. They only really covered a small section of my forehead, which wasn’t big enough to target the full length of the lines in this area. However, the two eye patches are large enough to cover a large surface area to address fine lines and wrinkles around the eyes. Plus, you’re not limited to where you can use them, so they’re handy for spot-targeting any area on your skin.

(Image credit: @eleanorvousden)
The patches are not painful to apply, however you do feel a slight prickle as the little darts come into contact with your skin. One thing I do want to address is the packaging of these patches—there is a lot of it. They’re no different from other microdart patches I’ve tried in that regard, but I didn’t love having to throw away the plastic casing and multiple films that you have to unwrap to get to the patches. From what I can see, they’re not recyclable.
The first time I tried them, I wore them overnight. The eye patches were a bit uncomfortable to remove because the adhesive is quite sticky, so take care in removing them. However, I could see that the areas looked notably hydrated and plumped come morning. After this, I decided to opt for wearing them for a couple of hours during the day, as I don’t love sleeping with them on my face. However, I do think they stopped my eyes and forehead from scrunching up quite so much as a side sleeper, so maybe I’ll reconsider.
The Radio Frequency Treatment
(Image credit: @eleanorvousden)
The second part of the treatment is the radio frequency, which lies in the device itself. This works by heating the skin to encourage collagen renewal, helping to address skin firmness and plump out fine lines and wrinkles.
There are three settings to choose from, so you can start on a low setting and progress as your skin acclimatises. Then, you need to apply the included gel on clean, dry skin before the treatment. I was initially a bit sceptical about how necessary the gel is. I’ve tried other at-home radio frequency devices that don’t require it, but just a water-based serum that you already own. However, a little of the gel goes a long way and doesn’t disappear halfway through your treatment like a serum would, so I feel it’s a worthwhile step to ensure the radiofrequency is working as efficiently as it should.
It was a bit confusing to set up at first. When I first plugged in the device, a green light flashed but then disappeared. You then need to press the button at the top to turn the device on. It has a semi-circle shaped dial that indicates the strength of your treatment by pressing the same button again to toggle between the different modes. Once you’ve set the treatment strength and applied your gel, you can apply the nodes to the skin.
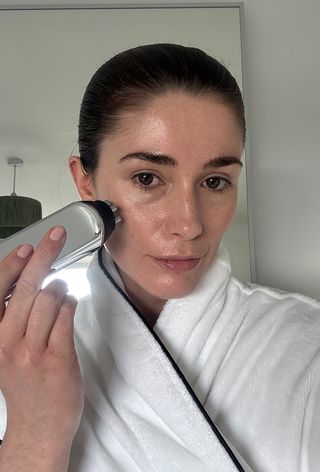
(Image credit: @eleanorvousden)
I started with the lowest setting for my first treatment. You can gradually feel your skin warming on contact with the nodes. It actually feels really nice—it’s like a hot stone massage for your skin. Currentbody generally recommends five minutes for each area you’re treating (eg. chin, cheeks, jawline etc) and allowing 10 minutes for the forehead. All you have to do is slowly massage it over the skin until the green light turns orange when it’s time to finish the treatment or move onto another area. It can be hard to miss if you’re not paying attention to it as it doesn’t beep, and because it’s plugged into the mains you may be limited to using it in a mirror.
Immediately after the treatment, my skin was a little flushed. However, I stuck to doing my treatments in the evening anyway and any redness quickly subsided. There were no signs of redness the next day either. This treatment only needs to be done weekly, so I found it easy to slot into my routine. Once I felt comfortable with the first setting, I moved onto the next two strengths. They’re noticeably warmer, so it’s important to keep the device moving and not hover over the same place for too long.
I actually found the treatments to be really relaxing and it became a part of my winding down routine before bed. The only thing I will say is to avoid any active breakouts, as it can feel very intense when you run the device over them. Depending on what areas you’re treating, doing a full face could take about 45 minutes. But if you’re only addressing specific areas, it will only take 5 minutes per area.
Before and After
Before

(Image credit: @eleanorvousden)
After 4 Weeks
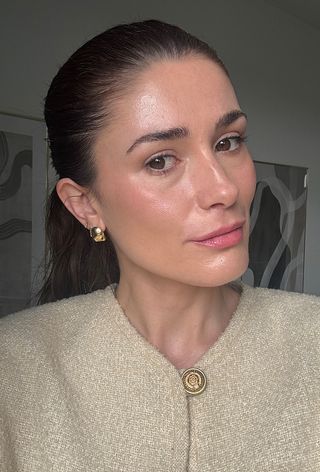
(Image credit: @eleanorvousden)
The Verdict
Despite having a few issues with the device and the patches, I actually really liked the results I saw from the treatments. My skin looks and feels more plumped and a little firmer, which I think has made my skin more glowy than usual. I didn’t think I was seeing results until I noticed about a month later that my skin was looking glowier and my makeup wasn’t settling into my lines as much—perhaps a result of the plumping benefits of the radio frequency tech and the microneedling patches. The fine lines around my eyes and forehead have definitely softened, which has been great to see since I stopped my Botox appointments.
The radio frequency treatments are really easy to do and I found them relaxing. The fact I only have to do one treatment a week for eight weeks, then only top-up every four to eight weeks, is a bonus. This feels easy enough to add into my routine. Having used this for a month, I’m pleased with the results I’ve seen so far and I’m looking forward to seeing how they progress with further treatments.
I’ll definitely be keeping up with the radiofrequency, but I’m not 100% sure I’m sold on the microneedling patches. They’re not as easy or enjoyable to use as the radio frequency and I feel that they are quite expensive for what they are. If I had to nit-pick about the device itself, I’d say it doesn’t feel as premium as other skin tools I’ve tried. That being said, it’s lightweight and easy to use, but maybe misses the luxurious touch I’ve had with the Currentbody LED mask, for example.
All in all, I think I’ve seen noticeable results from this device. Can it totally replace Botox or an in-clinic radio frequency microneedling treatment? I don’t think so. However, if you want an alternative to plump fine lines and tighten the skin, this is a brilliant at-home alternative. If you want a device that combines LED, microcurrent and radiofrequency all in one, I have thoroughly tested the Dessee Pro Sculpta, too.
Shop Now:
CurrentBody Skin
Skin RF Microneedling Treatment
CurrentBody Skin
Eye and Forehead Microneedle Patches -3 Week Supply
CurrentBody Skin
Skin Radiofrequency Gel